
If you're new to gardening from seed and have been wondering about the best approach, you're in luck! In this article, we'll delve into the pros and cons of seed starting indoors versus directly sowing them outdoors. We'll also provide you with a list of vegetables and situations where one method may be preferable over the other. While most vegetable seeds can thrive in either environment, there are certain seeds that simply don't fare well with transplantation. So, whether you're looking to get your hands dirty indoors or want to reap the benefits of direct sowing, we've got you covered!
Table of Contents
The Basics of Starting Seeds Indoors
If you're new to gardening from seed, you may have wondered about the benefits of starting seeds indoors versus directly sowing them outdoors. In this article, we will explore the process of germinating seeds, when to start seeds indoors, and how to choose the right seeds for indoor sowing. We will also discuss the pros and cons of starting seeds indoors, as well as common mistakes and troubleshooting tips. Finally, we will provide important tips and best practices for successful indoor seed starting.
Understand the Process of Germinating Seeds
Before you begin starting seeds indoors, it's important to understand the process of germination. Germination is the process by which a seed sprouts and begins to grow into a plant. This process requires moisture, oxygen, and the right temperature. When you start seeds indoors, you create a controlled environment that mimics the ideal conditions for germination. By providing the right amount of water, oxygen, and warmth, you can help your seeds germinate successfully.
Knowing When To Start Seeds Indoors
Knowing when to start seeds indoors is crucial for the success of your indoor gardening endeavor. The timing will vary depending on the specific plant and your location. Generally, you want to start seeds indoors a few weeks before the last expected frost date in your area. This allows the seedlings to grow and become strong enough to withstand outdoor conditions. To determine the ideal starting time for your seeds, refer to the information on the seed packets or consult a gardening guide specific to your region.
Choosing The Right Seeds To Start Indoors
Not all seeds are suitable for indoor sowing. Some seeds prefer to be directly sown outdoors and may not tolerate transplantation well. It's important to choose the right seeds for starting indoors to maximize your success rate. Consider factors such as the type of plant, its growth habits, and the recommended sowing method. Vegetables like tomatoes, peppers, eggplants, and herbs are commonly started indoors. On the other hand, root vegetables like carrots and radishes are generally better suited for direct sowing outdoors. Read the descriptions and information on the seed packets or consult reputable gardening resources to determine which seeds are best for indoor sowing.
Pros of Starting Seeds Indoors
Now that we understand the basics of starting seeds indoors let's explore the advantages of this method.
 When you start seeds indoors, you are creating an environment that is conducive to the growth of both plants and pests. Seedlings are more vulnerable to diseases and insect infestations compared to mature plants. The close proximity of seedlings in an indoor setting makes it easier for pests and diseases to spread from one plant to another. It's important to maintain good hygiene practices, such as using sterile containers and soil, providing adequate air circulation, and monitoring your seedlings for any signs of pests or diseases.
Control Over Growing Conditions
One of the main benefits of starting seeds indoors is the control it gives you over the growing conditions. By creating a controlled environment, you can ensure that your seeds receive the optimal conditions for germination and growth. You can control factors like temperature, humidity, and light to provide the ideal environment for your seedlings. This level of control allows you to maximize the chances of success and produce healthy, vigorous plants.
Potential for Higher Germination Rate
Starting seeds indoors often leads to a higher germination rate compared to direct sowing outdoors. In the controlled environment, you can provide the precise conditions required for each type of seed. By ensuring the right moisture levels, temperature, and light, you can increase the chances of successful germination. This higher germination rate means that more of your seeds will sprout and develop into healthy seedlings, giving you a head start in your garden.
Growing Beating Seasonal Weather Conditions
By starting seeds indoors, you can get a head start on the growing season and beat seasonal weather conditions. In regions with shorter growing seasons or unpredictable weather, starting seeds indoors allows you to extend your growing season and ensure a successful harvest. You can start your seeds indoors while it's still too cold or wet outside and then transplant them into the garden once the weather improves. This way, you can maximize the growth of your plants and have a bountiful harvest.
Allows for Selective Breeding
Starting seeds indoors also gives you the opportunity for selective breeding. If you have specific traits you want to develop in your plants, such as disease resistance or a particular color or flavor, you can carefully select the seeds from your best plants and save them for future sowing. This way, you have more control over the genetics of your plants and can create new varieties that suit your preferences. Selective breeding can lead to the development of unique and improved plant varieties.
Saves Money Compared to Buying Seedlings
Another advantage of starting seeds indoors is the cost savings. Buying seedlings from nurseries and garden centers can be expensive, especially if you need many plants. By starting seeds indoors, you can grow your own seedlings at a fraction of the cost. Seeds are generally much cheaper than buying seedlings, and you can save even more money by collecting and saving seeds from your own plants. Starting seeds indoors allows you to have various plants without breaking the bank.
Cons of Starting Seeds Indoors
While starting seeds indoors has its advantages, there are also some challenges and drawbacks to consider.
Requires More Time and Energy
Starting seeds indoors requires a significant investment of time and energy. You need to set up and maintain an indoor growing area, provide the right conditions for germination and growth, monitor and care for the seedlings, and eventually transplant them into larger containers or the garden. This process requires regular attention and can be time-consuming, especially during the initial stages. If you have a busy schedule or limited time, starting seeds indoors may not be the best option for you.
Risk of Disease and Insect Infestations
Challenges of Transplanting
Transplanting seedlings from indoor containers to the garden can be a challenging process. Seedlings that have been started indoors require a period of acclimation to outdoor conditions before they can be planted in the ground. This process, known as hardening off, involves gradually exposing the seedlings to outdoor temperatures, sunlight, and wind. Transplanting young seedlings without proper hardening off can shock the plants and lead to stunted growth or even death. It's important to plan and prepare for successful transplanting to ensure the health and vitality of your plants.
Needs Space and Proper Infrastructure
Starting seeds indoors requires adequate space and the proper infrastructure. You need a well-lit area with enough room to accommodate your seed trays or containers. This space should also have access to a water source and be easily accessible for regular maintenance tasks. Additionally, you'll need proper equipment such as grow lights, heating mats, and ventilation to create the ideal growing conditions. If you have limited space or lack the necessary infrastructure, starting seeds indoors may not be feasible for you.
Potential for Lower Germination Rate Due to Human Error
While starting seeds indoors can increase your germination rate, there is still a potential for lower success due to human error. Factors such as overwatering or underwatering, improper temperature control, insufficient light, or poor soil quality can all negatively impact the germination and growth of your seedlings. It's important to closely monitor and adjust these factors to avoid any mistakes that could hinder the success of your indoor seed starting. Learning from experience and following best practices can help minimize the chances of human error.
Choosing the Right Seeds to Start Indoors
Now that we understand the pros and cons of starting seeds indoors let's delve into the process of choosing the right seeds for indoor sowing.
Factors to Consider When Choosing Seeds
When selecting seeds for indoor sowing, there are several factors to consider. First, consider the type of plant and its growth habits. Some plants, like tomatoes and peppers, are well-suited for indoor starting due to their longer growing seasons and preference for warmer temperatures. Next, consider the recommended sowing method indicated on the seed packets or in gardening resources. Some seeds may require special treatment, such as scarification or stratification before they can successfully germinate indoors. Be sure to choose seeds that align with your indoor gardening capabilities and preferences. 
Descriptions and Information on Seed Packets
The information provided on seed packets is an invaluable resource when choosing seeds for indoor sowing. Seed packets typically contain detailed descriptions of the plant, including its growth habits, preferred growing conditions, and specific instructions for germination and transplanting. Pay close attention to the recommended sowing depth, spacing, and timing for each type of seed. Additionally, seed packets often include the germination rate, which can help you assess the viability and potential success of the seeds.
Which Plants Prefer Indoor Sowing
While most vegetable seeds can be started either indoors or outdoors, there are some plants that prefer indoor sowing. Vegetables like tomatoes, peppers, eggplants, and herbs commonly start indoors because they require longer growing seasons and warmer temperatures. Starting these plants indoors allows you to give them a head start and ensure a successful harvest. On the other hand, root vegetables like carrots and radishes are generally better suited for direct sowing outdoors. These plants prefer cooler temperatures and can be sown directly in the garden.
Preparing for Sowing Indoors

Once you've chosen the right seeds for indoor sowing, it's important to properly prepare for the process. This involves determining the necessary equipment, setting up an indoor growing area, and preparing the soil for sowing.
Determining the Equipment Needed
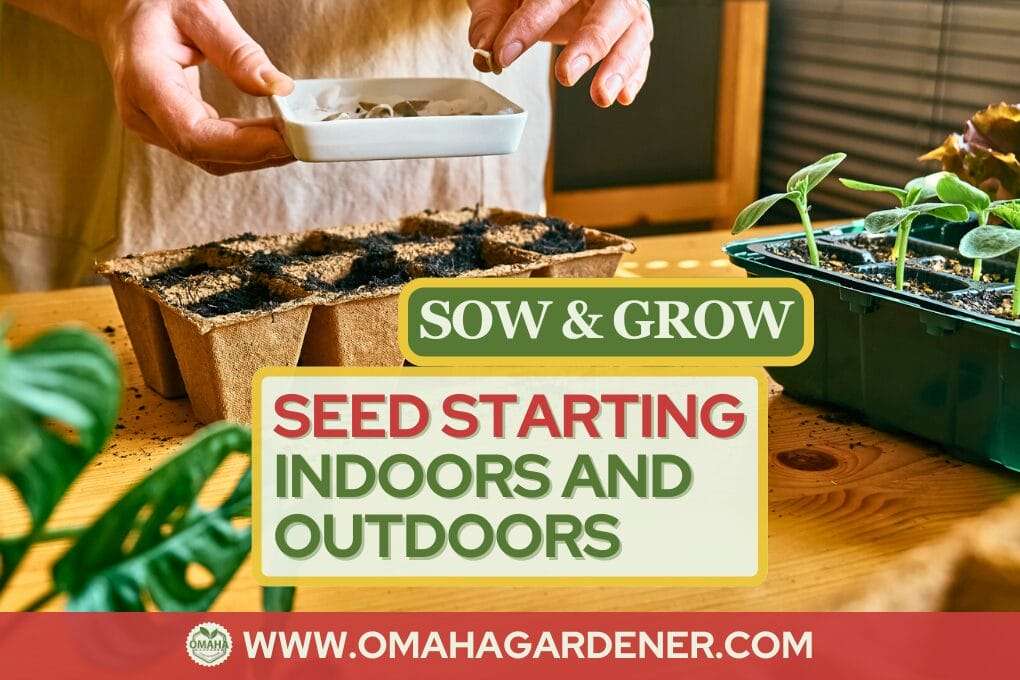
Before you start sowing seeds indoors, take inventory of the necessary equipment. Some essential items include seed trays or containers, seed-starting mix or sterile potting soil, grow lights or a sunny window, heating mats (if needed), plant markers or labels, and a water source. Depending on your specific needs and preferences, you may also require additional equipment such as humidity domes, fans for air circulation, or a timer for grow lights. Take time to gather and organize all the necessary equipment to ensure a smooth and successful indoor seed-starting process.
5 Must-Have Seed-Starting Supplies
- Sturdy Seed Trays: Your seed's first home. Choose quality plastic trays or plug trays that are fit for the number of plants you are planning to grow. Think of sturdy seed trays as the nursery for your future plants. They provide a safe and controlled environment for your seeds to germinate and grow. Choosing trays with individual cells or compartments is essential because it makes transplanting your seedlings into the garden much easier. This prevents root disturbance and minimizes transplant shock, ensuring a smoother transition for your young plants. Pro Tip: adding plastic domes will help with germination.
- High-quality Seeds: The main characters of this story. Select varieties that suit your local climate. The seeds you select are like the leading actors in a play. Choosing high-quality seeds is crucial for a successful garden. Make sure to purchase seeds from reputable suppliers to ensure their viability. Moreover, it's essential to consider your local climate when selecting seed varieties. Some plants thrive in specific conditions, so choose seeds that are well-suited to your region to maximize your garden's success.
- Seedling Soil Mix: Your seeds' all-you-can-eat buffet. Opt for a mix that's light yet nutrient-dense. Seedlings have delicate roots, and the soil mix you provide them is like their buffet. A good seedling soil mix should be well-draining to prevent waterlogged roots while retaining enough moisture for healthy growth. Look for a mix that is light and fluffy, often composed of peat moss, vermiculite, and perlite. You can also add compost for added nutrients. This ensures your baby plants have access to the nutrients they need for a strong start.
- Watering Can/Bottle: A hydration device that won't flood your baby plants. When it comes to watering your seedlings, a gentle touch is crucial. A watering can or bottle with a fine attachment is ideal because it delivers a soft and even stream of water, preventing the disturbance of your delicate seedlings. Avoid using a heavy stream of water that could dislodge or damage the young plants. Consistent, gentle watering helps keep the soil evenly moist without drowning your seedlings.
- Heat Mats: For those seeds that need a warm hug to germinate. A must-have for colder climates. Heat mats are like cozy blankets for your seeds, especially if you're gardening in a colder climate. Some seeds, like peppers, tomatoes, and tropical plants, require warm soil to germinate successfully. Heat mats provide a controlled and consistent warmth, promoting faster and more uniform germination. They are a valuable tool to give your seeds that extra push they need to thrive in less-than-ideal temperature conditions.
Setting Up an Indoor Growing Area
Creating an ideal indoor growing area is crucial for the success of your seedlings. Choose a well-lit space that receives at least 6-8 hours of bright, indirect sunlight per day. If natural light is insufficient, consider using supplemental grow lights to provide the necessary light intensity and duration. Arrange your seed trays or containers in a way that allows for good air circulation and easy access for maintenance tasks. Set up a dedicated table or shelf to organize and display your growing seedlings. Ensure that the space is clean, easily accessible, and has a stable temperature to promote healthy growth.
Preparing the Soil for Sowing
To give your seeds the best start, it's important to prepare the soil for sowing. Use a high-quality seed starting mix or sterile potting soil for a suitable growing medium. Avoid using garden soil, as it may contain pathogens, weed seeds, or other contaminants that could harm your seedlings. Moisten the soil before sowing to ensure even moisture distribution. Fill your seed trays or containers with moistened soil, leaving a small gap at the top for watering. Gently press the soil to create a firm surface for sowing. Follow the instructions on the seed packets for the appropriate sowing depth and spacing for each type of seed.
Sowing Techniques for Indoor Seeds
Now that the stage is set for indoor sowing let's dive into the techniques and considerations for sowing seeds indoors.
Methods of Sowing Seeds
There are several methods you can use to sow seeds indoors, depending on your preference and the type of seeds. The two most common methods are broadcasting and row sowing. Broadcasting involves scattering the seeds uniformly over the soil surface and lightly pressing them into the soil. This method is suitable for small seeds that don't require precise spacing. Row sowing, on the other hand, involves creating shallow furrows in the soil and sowing the seeds in neat rows. This method is better suited for larger seeds or those that require specific spacing. Choose the method that works best for your seeds and gardening style.
Timing and Temperature Considerations
Timing is crucial when sowing seeds indoors. Refer to the seed packets or gardening resources to determine the optimal sowing time for each type of seed. Some seeds have specific temperature requirements for germination and growth. Use a thermometer to monitor the soil temperature and adjust it as necessary. Generally, the ideal soil temperature for germination ranges between 70-85°F (21-29°C). If your seedlings require bottom heat for germination, consider using heating mats or placing the containers on a warm surface. Remember to maintain consistent moisture levels throughout the germination and growth process to support successful seedling development.
Watering and Light Considerations
Proper watering and light are vital for the successful germination and growth of your seedlings. Water your seeds immediately after sowing to settle the soil and ensure good seed-to-soil contact. After that, water the seedlings gently and consistently to keep the soil evenly moist but not waterlogged. Avoid overwatering, as it can lead to fungal growth or rot. Monitor the moisture levels closely, as the seedlings may require more frequent watering as they grow.
Additionally, providing adequate light is crucial for healthy seedling development. If using grow lights, position them a few inches above the seedlings and adjust their height as the seedlings grow. Rotate the trays regularly to promote even light distribution and prevent seedlings from leaning toward the light source.
Caring for Seedlings After Germination

Once your seedlings have germinated, it's essential to provide proper care to ensure their continued growth and development.
Providing Adequate Light
As the seedlings grow, providing adequate light becomes increasingly important. If using grow lights, adjust their height to keep the lights a few inches above the tops of the seedlings. This will prevent them from becoming leggy or stretching towards the light source. Monitor the seedlings for any signs of inadequate light, such as pale or yellowing leaves, weak growth, or stretching. If natural light is insufficient, consider using a supplemental grow light or providing additional indirect sunlight. Aim for 12-16 hours of light daily to support healthy and vigorous growth.
Grow lights are artificial light sources designed to provide plants with the necessary light spectrum for photosynthesis, typically used in indoor or low-light conditions. They are essential for ensuring that plants receive adequate light, especially in settings where natural sunlight is insufficient or unavailable. Grow lights are crucial for promoting healthy growth, robust foliage, and successful flowering and fruiting in a wide range of plants, making them indispensable for indoor gardening, seed starting, and maintaining plants year-round.
Regulating Temperature and Humidity
Maintaining appropriate temperature and humidity levels is crucial for the health and vitality of your seedlings. Most seedlings prefer daytime temperatures between 60-75°F (15-24°C) and slightly cooler temperatures at night. Avoid exposing the seedlings to extreme temperature fluctuations or drafts, as it can stress the plants and affect their growth. Monitor the humidity levels in the growing area and adjust them as necessary. Use humidity domes or mist the seedlings with water to increase humidity if needed. Proper temperature and humidity regulation will help your seedlings thrive and prepare them for successful transplanting.
Transplanting into Larger Containers
As the seedlings grow and develop, they will outgrow their initial containers and require more space for their roots to spread. Transplant the seedlings into larger containers when they are large enough to handle and have developed their first set of true leaves. Using a pair of clean, sterilized pruners or scissors, carefully remove the seedlings from their original containers, taking care not to damage the delicate roots. Gently place the seedlings into the new containers, ensuring that they are at the same depth as they were before. Fill the containers with the appropriate potting mix and firm the soil around the seedlings. Water the newly transplanted seedlings gently to help them establish in their new containers.
When and How to Transplant Seedlings
Once your seedlings are ready to be transplanted, it's important to know the right time and techniques for successful transplantation.
Recognizing When Seedlings Are Ready to Transplant
There are a few indicators that your seedlings are ready to be transplanted into the garden. First, the seedlings should have developed their first set of true leaves. These are the leaves that follow the initial cotyledon leaves. Additionally, the seedlings should have a well-developed root system and sufficient strength to withstand transplantation. The roots should be filling the container and starting to poke through the drainage holes. It's important to monitor the growth and development of your seedlings closely to ensure that they are transplanted at the right time.
Techniques for Transplant
Transplanting seedlings from indoor containers to the garden requires care and precision to ensure successful establishment. Begin by watering the seedlings thoroughly a few hours before transplanting. This will help hydrate the plants and make it easier to remove them from their containers. Gently loosen the soil around the seedlings and carefully lift them out, taking care not to damage the roots.
Dig a hole in the garden that is slightly larger than the root ball of the seedling. Place the seedling in the hole, making sure it is at the same depth as it was in the container. Backfill the hole with soil, firming it gently around the seedling. Water the transplanted seedlings immediately to settle the soil and reduce transplant shock.
Acclimating Seedlings to Outdoor Conditions
Before transplanting seedlings into the garden, it's important to acclimate them to the outdoor conditions. This process, known as hardening off, involves gradually exposing the seedlings to outdoor temperatures, sunlight, and wind. Begin by placing the seedlings outdoors in a sheltered location for a few hours daily.
Gradually increase the duration and intensity of outdoor exposure over the course of a week or two. This gradual acclimation helps the seedlings adjust to the outdoor conditions and reduces the risk of transplant shock. Be attentive to weather conditions and bring the seedlings indoors or provide protection if temperatures drop below their tolerance or if there is a risk of frost.
Deciding When and Where to Transplant
The timing and location of transplanting will depend on various factors, including the specific plant, your local climate, and the condition of the soil. Transplant seedlings into the garden when all risk of frost has passed and the soil has warmed up sufficiently. This is typically after the last expected frost date in your area.
Choose a location in the garden that meets the specific requirements of each plant, such as sunlight, soil pH, moisture levels, and spacing. Prepare the planting holes by loosening the soil, removing any weeds or debris, and amending the soil if necessary. Carefully transplant the seedlings following the techniques mentioned earlier, and water them thoroughly to help them establish in their new location.
Depending on your seed starting, you may have to transplant smaller plants to a larger container / larger pots before transplanting to your garden. If you find yourself in this situation, be sure to use clean pots, and minimize plant stress.
Common Mistakes and Troubleshooting
Despite our best efforts, mistakes can still happen when starting seeds indoors. Let's explore common mistakes and how to address them to improve your success rate.
Common Mistakes When Seed Starting Indoors
Overwatering is a common mistake made when starting seeds indoors. It's essential to maintain consistent moisture levels but also to avoid saturating the soil. Allow the top inch of soil to dry out slightly between waterings to prevent excessive moisture and root rot. Another mistake is sowing seeds too deeply or too shallowly.
Follow the recommended sowing depth indicated on the seed packets to ensure proper germination. Additionally, inadequate or excessive lighting can hinder the growth of your seedlings. Keep the lights at the appropriate distance and duration to provide adequate light intensity without causing stress.
Identifying and Addressing Common Seedling Problems
Seedling problems can arise due to various factors, including pests, diseases, nutrient deficiencies, or improper growing conditions. Keep a close eye on your seedlings and monitor them for any signs of stress or damage.
Common issues include stunted growth, yellowing leaves, wilting, or spotting. If you notice any problems, investigate the potential causes and take appropriate action. Isolate and treat infected seedlings, adjust watering or lighting practices, or provide necessary supplemental nutrients. Promptly addressing any issues will help minimize damage and improve the health and vigor of your seedlings.
How to Reduce Seedling Mortality and Boost Success Rate
Reducing seedling mortality and increasing your success rate requires careful attention to the needs of your plants. Start with proper seed selection, ensuring that you are sowing the appropriate seeds for your indoor gardening conditions.
Follow best practices for sowing, providing the right environment, and taking into account the specific requirements of each plant. Monitor the seedlings closely and address any issues promptly to minimize damage and maximize their chances of survival. Regularly maintain the proper temperature and humidity levels, provide sufficient light and water, and adjust the growing conditions as needed.
Troubleshooting Guide for Unsuccessful Germination
If you experience unsuccessful germination, it's important to troubleshoot the potential causes to improve future results. One common issue is using non-viable or expired seeds. Ensure that you are using fresh, high-quality seeds from reputable sources. Inadequate moisture or improper temperature can also hamper germination.
Make sure the soil is evenly moist during the germination process, and maintain the recommended temperature range for each type of seed. Incorrect sowing depth or improper seed-to-soil contact can also affect germination. Follow the instructions on the seed packets and gently press the seeds into the soil to ensure good seed-to-soil contact.
Important Tips and Best Practices
To wrap up our comprehensive guide to starting seeds indoors, let's delve into some important tips and best practices for success.
Additional Tips for Successful Indoor Seed Starting
Here are some additional tips to enhance your success when starting seeds indoors:
- Use clean and sterile containers and tools to prevent the spread of diseases.
- Use a spray bottle to lightly mist young seedlings. This is the best way to top water seedlings during the first few days.
- Label your seed trays or containers to keep track of the different varieties and sowing dates.
- Keep a gardening journal to record your observations, techniques, and results for future reference.
- Maintain good hygiene practices, such as washing your hands before handling seeds or seedlings.
- Avoid overcrowding your seedlings because it will lead to resource competition and poor growth.
Advanced Techniques for Improved Germination and Growth
If you want to take your indoor seed starting to the next level, consider implementing some advanced techniques:
- Use bottom heat to promote faster and more uniform germination.
- Try pre-soaking or scarifying seeds with hard seed coats to enhance germination.
- Experiment with different types of growing mediums, such as coco coir or vermiculite.
- Consider using a seedling heat mat or a temperature-controlled germination chamber for precise temperature control.
Non-Conventional Indoor Seed Starting Methods
While traditional indoor seed-starting methods are widely practiced, there are also non-conventional approaches you can explore:
- Try hydroponics or aquaponics to grow your seedlings in a soilless environment.
- Experiment using a grow tent or a vertical gardening system to maximize space efficiency.
- Explore air layering or grafting techniques to propagate plants from existing stock instead of starting from seeds.
Maximizing Harvests from Indoor-Started Seeds
To maximize your harvests from indoor-started seeds, consider these tips:
- Provide the appropriate support, such as trellises or stakes, for vining or tall plants.
- Continually monitor and adjust your watering and fertilization practices to promote healthy growth.
- Regularly prune and trim your plants to promote bushier growth and increase airflow.
- Harvest your vegetables immediately to ensure optimal flavor and nutritional value.
Now that you've armed yourself with knowledge on seed starting, it's time to put your green thumb to work! Don't hesitate; take that first step and start your indoor garden today. Gather your supplies, select your seeds, and create the perfect environment for your plants to flourish.
Action Time
Remember, gardening is not just a hobby; it's a rewarding journey that connects you with nature and provides a bountiful harvest of fresh, homegrown goodness. So, roll up your sleeves, get your hands in the soil, and watch your garden thrive. Your call to action: Plant those seeds and start nurturing your indoor garden now! Happy gardening!